


Yes, you can absolutely take stunning boudoir photos of yourself with your iPhone! Discover simple, empowering techniques to capture beautiful, intimate portraits in the comfort of your own home, no professional photographer needed.
Feeling a little camera-shy about boudoir photos? You’re not alone! Many people think you need a fancy studio and a professional photographer to get those gorgeous, intimate shots. But what if I told you that your iPhone, that powerful little device in your pocket, is more than capable of creating breathtaking boudoir images? It’s true! You can unleash your inner confidence and capture your unique beauty right in your own space, on your own terms. Forget expensive sessions and awkward posing; this guide is all about empowering you with simple, effective secrets to take stunning boudoir photos yourself. Ready to discover how? Let’s dive in!
Your iPhone Boudoir Photo Shoot: The Ultimate Beginner’s Guide
Taking boudoir photos of yourself can feel a bit daunting, but it’s a fantastic way to boost your confidence and celebrate your body. With a few smart tips and tricks, your iPhone can become your secret weapon for creating intimate, empowering images. We’ll cover everything from setting the mood to mastering those flattering angles, all designed to make you feel comfortable and look amazing.
The “Shocking” Secrets to Self-Boudoir: What You Really Need to Know

Let’s get straight to the heart of it. These aren’t really “secrets” in a hidden sense, but rather overlooked techniques that make a massive difference when you’re shooting boudoir solo.
1. Embrace the Natural Light: Your Best Friend
Forget harsh overhead lights! Natural light is your secret weapon for soft, flattering illumination.
Window Light: Position yourself near a window. The soft, diffused light creates beautiful shadows and highlights. Avoid direct, harsh sunlight that can create unflattering shadows. Overcast days are often ideal!
Golden Hour: The hour after sunrise and the hour before sunset offer a warm, soft glow that’s incredibly flattering.
Avoid Flash: Unless you’re using an external, diffused flash, the built-in iPhone flash can be too harsh and create unnatural lighting for boudoir.
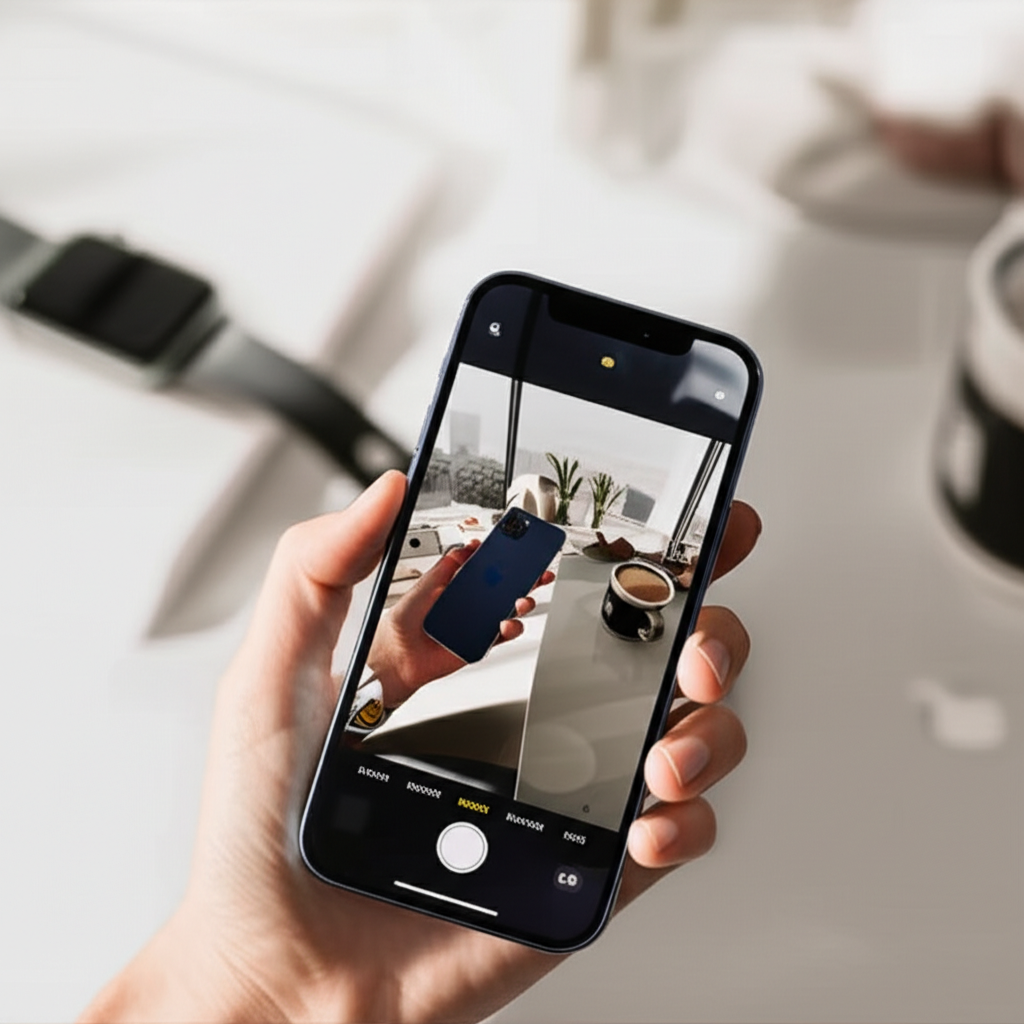
2. The Power of Your iPhone Camera Settings
Your iPhone camera is more sophisticated than you might think!
Portrait Mode: This is your absolute best friend for boudoir. It blurs the background, making you the clear focus and giving your photos a professional, polished look. Experiment with the different lighting effects within Portrait Mode (Natural Light, Studio Light, Contour Light).
Grid Lines: Turn on your grid lines in Settings > Camera. This helps immensely with composition and keeping your horizon lines straight, especially if you’re angling the phone.
Focus and Exposure: Tap on your subject (you!) on the screen to set the focus. Then, you can slide your finger up or down to adjust the exposure (brightness) before you take the shot. This is crucial for getting the perfect lighting on your face and body.
Zoom Wisely: Avoid digital zoom on your iPhone as much as possible, as it degrades image quality. Instead, try to physically move closer to your subject. If you have an iPhone with multiple lenses (like the Pro models), use the optical zoom options (e.g., 1x, 2x, 3x) for the best quality.
3. Posing Confidence: It’s All About the Angle
Posing can feel awkward when you’re your own photographer, but focusing on a few key principles makes it easy.
The “S” Curve: Think about creating gentle curves with your body. Arching your back slightly, angling your hips, and turning your torso can create a beautiful, flattering silhouette.
Angles, Angles, Angles: Avoid facing the camera directly head-on. Try turning your body at a 45-degree angle. Slightly tilting your head or angling your chin down can also be very flattering.
Hands: Don’t let your hands just hang there! Gently touch your hair, your face, your neck, or a prop. This adds elegance and breaks up the pose.
Relax Your Shoulders: Drooping shoulders can make you look tired. Try to lift your shoulders slightly and pull them back subtly.
Movement: Don’t be afraid to move! Shift your weight, adjust your pose slightly, run your hands through your hair. These small movements can lead to unexpectedly beautiful candid shots.
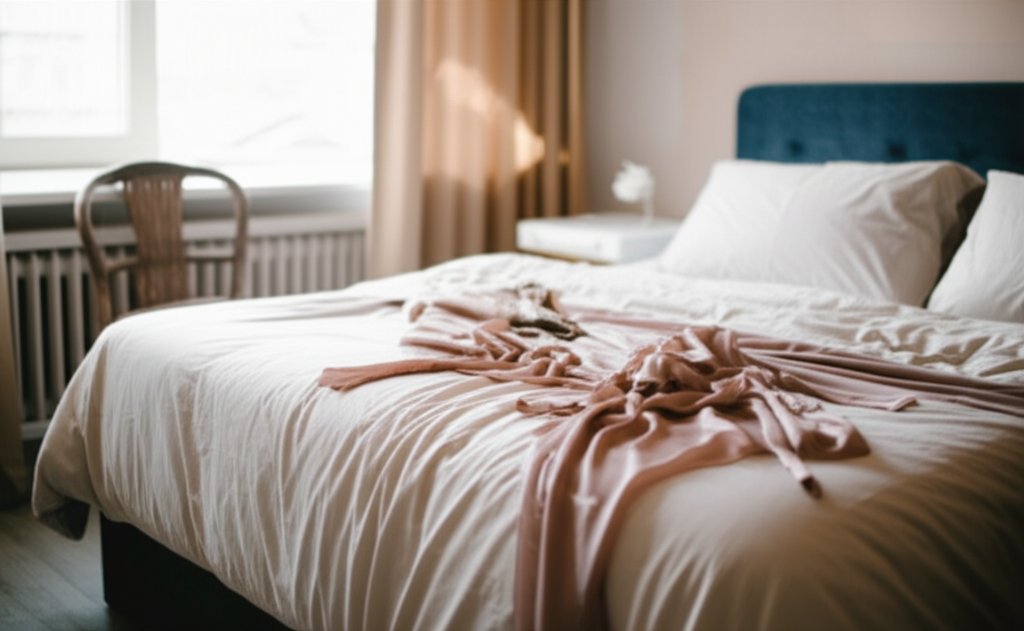
4. Setting the Scene: Creating the Mood
The environment plays a huge role in boudoir photography.
Your Bedroom or Living Room: These are perfect, intimate spaces. Tidy up, but don’t aim for sterile perfection. A rumpled duvet, a soft blanket, or a cozy armchair can add texture and warmth.
Props: Think about simple props that enhance the mood. A silk robe, a delicate piece of jewelry, a favorite book, or even a simple bouquet of flowers can add a personal touch.
Music: Create a playlist of music that makes you feel good, confident, and relaxed. This will help you get into the right headspace.
Comfort: Wear something that makes you feel beautiful and comfortable. This could be lingerie, a favorite oversized shirt, or even just a cozy sweater. The focus is on how you feel.
5. The Tech You Need (It’s Minimal!)
You don’t need a ton of gear. Your iPhone is the star, but a few accessories can elevate your shoot.
Tripod: This is essential for self-portraits. It allows you to set up your shot, frame it perfectly, and use a timer or remote. Look for a flexible tripod that can be used on different surfaces or a sturdy one with adjustable legs.
Remote Shutter: A Bluetooth remote shutter (often very inexpensive) or using the volume buttons on your headphones (if they have them) can be a lifesaver. This prevents camera shake and allows you to capture shots from a distance.
External Lens (Optional): While not necessary, an external wide-angle or portrait lens for your iPhone can offer even more creative options.
Step-by-Step: Your iPhone Boudoir Photo Shoot Plan
Let’s break down the process into manageable steps.
Step 1: Preparation & Mindset
Choose Your Outfit: Select something that makes you feel amazing. It doesn’t have to be traditional lingerie; it can be anything that makes you feel confident and beautiful.
Set the Scene: Tidy your chosen space, adjust lighting (open curtains, turn off harsh overhead lights), and put on your mood-boosting music.
Hydrate & Snack: Drink water and have a light snack beforehand to feel your best.
Get Ready: Do your hair and makeup if that makes you feel good. The goal is to feel comfortable and confident.
Step 2: Setting Up Your iPhone
Mount Your iPhone: Securely place your iPhone on a tripod or a stable surface at the height you want.
Frame Your Shot: Use your iPhone’s camera app (or a third-party app with advanced controls) to frame your first shot. Think about where you want to be in the frame.
Select Mode: Switch to Portrait Mode for that beautiful background blur.
Set Timer/Remote: Set the camera timer (usually 3-10 seconds) or prepare your Bluetooth remote.
Step 3: Posing & Shooting
Start with Simple Poses: Begin with relaxed poses. Sit on your bed, lean against a wall, or lounge on the floor.
Focus on Angles: Turn your body, tilt your head, and experiment with different angles. Remember the “S” curve!
Use Your Hands: Gently place your hands on your face, hair, or body.
Play with Light: Move slightly to see how the natural light falls on you.
Shoot, Review, Adjust: Take a burst of photos, then quickly review them on your iPhone. See what you like and what you want to change. Adjust your pose, angle, or lighting.
Experiment: Don’t be afraid to try different expressions, movements, and poses. Some of the best shots are unexpected!
Step 4: Editing Your Photos
iPhone’s Built-in Editor: The Photos app on your iPhone has a surprisingly powerful editor.
Crop and Straighten: Ensure your lines are straight and crop to improve composition.
Adjust Exposure and Contrast: Fine-tune the brightness and contrast to make your features pop.
Highlights and Shadows: Use these sliders to bring out detail in bright or dark areas.
Color Saturation/Vibrance: Subtly boost colors if needed.
Portrait Mode Adjustments: If you used Portrait Mode, you can tap “Edit” and then tap the “f” icon (aperture setting) to adjust the depth of field (how blurry the background is).
Third-Party Apps: For more advanced editing, consider apps like VSCO, Snapseed, or Adobe Lightroom Mobile. These offer more granular control over color, tone, and retouching.
Table: iPhone Camera Features for Boudoir
| Feature | How it Helps Boudoir Photography | Tips for Use |
| :————- | :——————————————————————– | :————————————————————————————————————————————– |
| Portrait Mode | Creates a shallow depth of field, blurring the background and making you the focal point. | Experiment with different lighting effects (Natural, Studio, Contour). Adjust the aperture (f-stop) after shooting for more background blur. |
| Grid Lines | Aids in composition, helping you follow the rule of thirds and keep horizons straight. | Turn on in Settings > Camera > Grid. Use them to balance your frame and create visually pleasing arrangements. |
| Exposure Adjustment | Allows you to control the brightness of the photo before taking it. | Tap on your face to focus, then slide your finger up or down to brighten or darken the image for perfect skin tones. |
| Optical Zoom (Pro Models) | Provides higher quality zoom without degrading the image. | Use the 1x, 2x, or 3x zoom options on Pro models instead of pinching to zoom digitally, especially if you can’t get physically closer. |
| Live Photos | Captures a few seconds of motion, allowing you to choose the best still frame or create a boomerang. | Can capture subtle movements and expressions that add life to your photos. |
Common Boudoir Posing Mistakes (And How to Fix Them!)
It’s easy to fall into common traps when you’re shooting yourself. Here’s how to avoid them.
The Stiff Pose: If you look too rigid, try to incorporate gentle curves and movement. Arch your back slightly, shift your weight, or run your hands through your hair.
Facing Directly Forward: This can sometimes feel confrontational or less flattering. Try turning your body 45 degrees away from the camera.
“Dead” Hands: Hands that just hang limp can look awkward. Guide your hands to touch your face, hair, neck, or a prop gracefully.
Bad Lighting: Avoid direct overhead lights or harsh sunlight. Seek out soft, natural light from a window.
Over-Editing: While editing is important, overdoing it can make your photos look unnatural. Focus on subtle enhancements.
When to Consider Professional Help
While self-boudoir is empowering, there are times when a professional can offer a unique experience and perspective. If you’re looking for:
Expert Guidance: A professional photographer knows how to pose you perfectly and guide your expressions.
Studio Quality: Access to professional lighting, backdrops, and a controlled environment.
A Pampering Experience: Many boudoir photographers offer hair and makeup services, turning the shoot into a full day of pampering.
Specific Artistic Vision:** If you have a very particular aesthetic in mind, a pro can help bring it to life.
For those interested in exploring professional options, you can find photographers through platforms like The Knot or by searching locally. Reputable studios often have portfolios showcasing their work, which can give you an idea of their style.
Frequently Asked Questions About Self-Boudoir Photography
Q1: What is the best time of day to take boudoir photos at home?
A1: The best time is during daylight hours when you have access to soft, natural light. Overcast days or the hours around sunrise and sunset (golden hour) provide the most flattering light. Avoid harsh midday sun.
Q2: Do I need special lingerie for boudoir photos?
A2: Not at all! While lingerie is traditional, the most important thing is to wear something that makes you feel confident and beautiful. This could be an oversized shirt, a cozy sweater, a bralette and shorts, or anything that makes you feel empowered.
Q3: How can I feel more confident in front of the camera when shooting myself?
A3: Focus on the music, the mood, and how you feel* in your outfit. Practice some poses in a mirror beforehand. Remember that you’re creating these images for yourself, to celebrate your own beauty. It gets easier with practice!
Q4: What if my home isn’t aesthetically pleasing?
A4: Don’t worry about perfection! Focus on one small area – a corner of your bedroom, a cozy armchair, or even just a simple bedspread. Natural light and your confident posing will be the main focus, not the background details.
Q5: How do I get good angles without a second person?
A5: Use a tripod and experiment! Take test shots to see how the angles look. Try turning your body, angling your hips, and tilting your head. Often, slightly turning away from the camera and looking back over your shoulder is very flattering.
Q6: Can I use my iPhone’s front-facing camera?
A6: Yes, you can! The front-facing camera (selfie camera) is convenient for framing. However, the rear camera on most iPhones generally offers higher image quality. If using the front camera, ensure good lighting and use a tripod to keep it steady.
Conclusion: Your Empowered Boudoir Journey
Taking boudoir photos of yourself with your iPhone is a journey of self-discovery and empowerment. It’s about celebrating your unique beauty, building confidence, and creating intimate, personal art. By mastering the use of natural light, understanding your iPhone’s camera capabilities, and practicing simple posing techniques, you can achieve stunning results right in the comfort of your own home. Remember, the most important element is how you feel – embrace your confidence, have fun with the process, and treasure the beautiful images you create. You’ve got this!

